All posts by AI Editor

Road Trip Rescue: The Motorhome That Met a Very Confident Mailbox

Once upon a time, a happy motorhome set off on a happy road trip. This is the part of the story where a small detour led to our shop, and where everything worked out in the end.

What Happened

Our fictional road-trippers had planned everything: the route, the snacks, and a playlist with exactly one song about open roads. What they had not planned for was a mailbox standing at the corner of a very tight campground turn, holding its ground like a tiny, determined toll booth.

The mailbox did not budge. The front corner of the motorhome picked up a few holes and some scuffed dignity, and the trip paused for repairs. Campground Site 14 would simply have to wait.

The Challenge

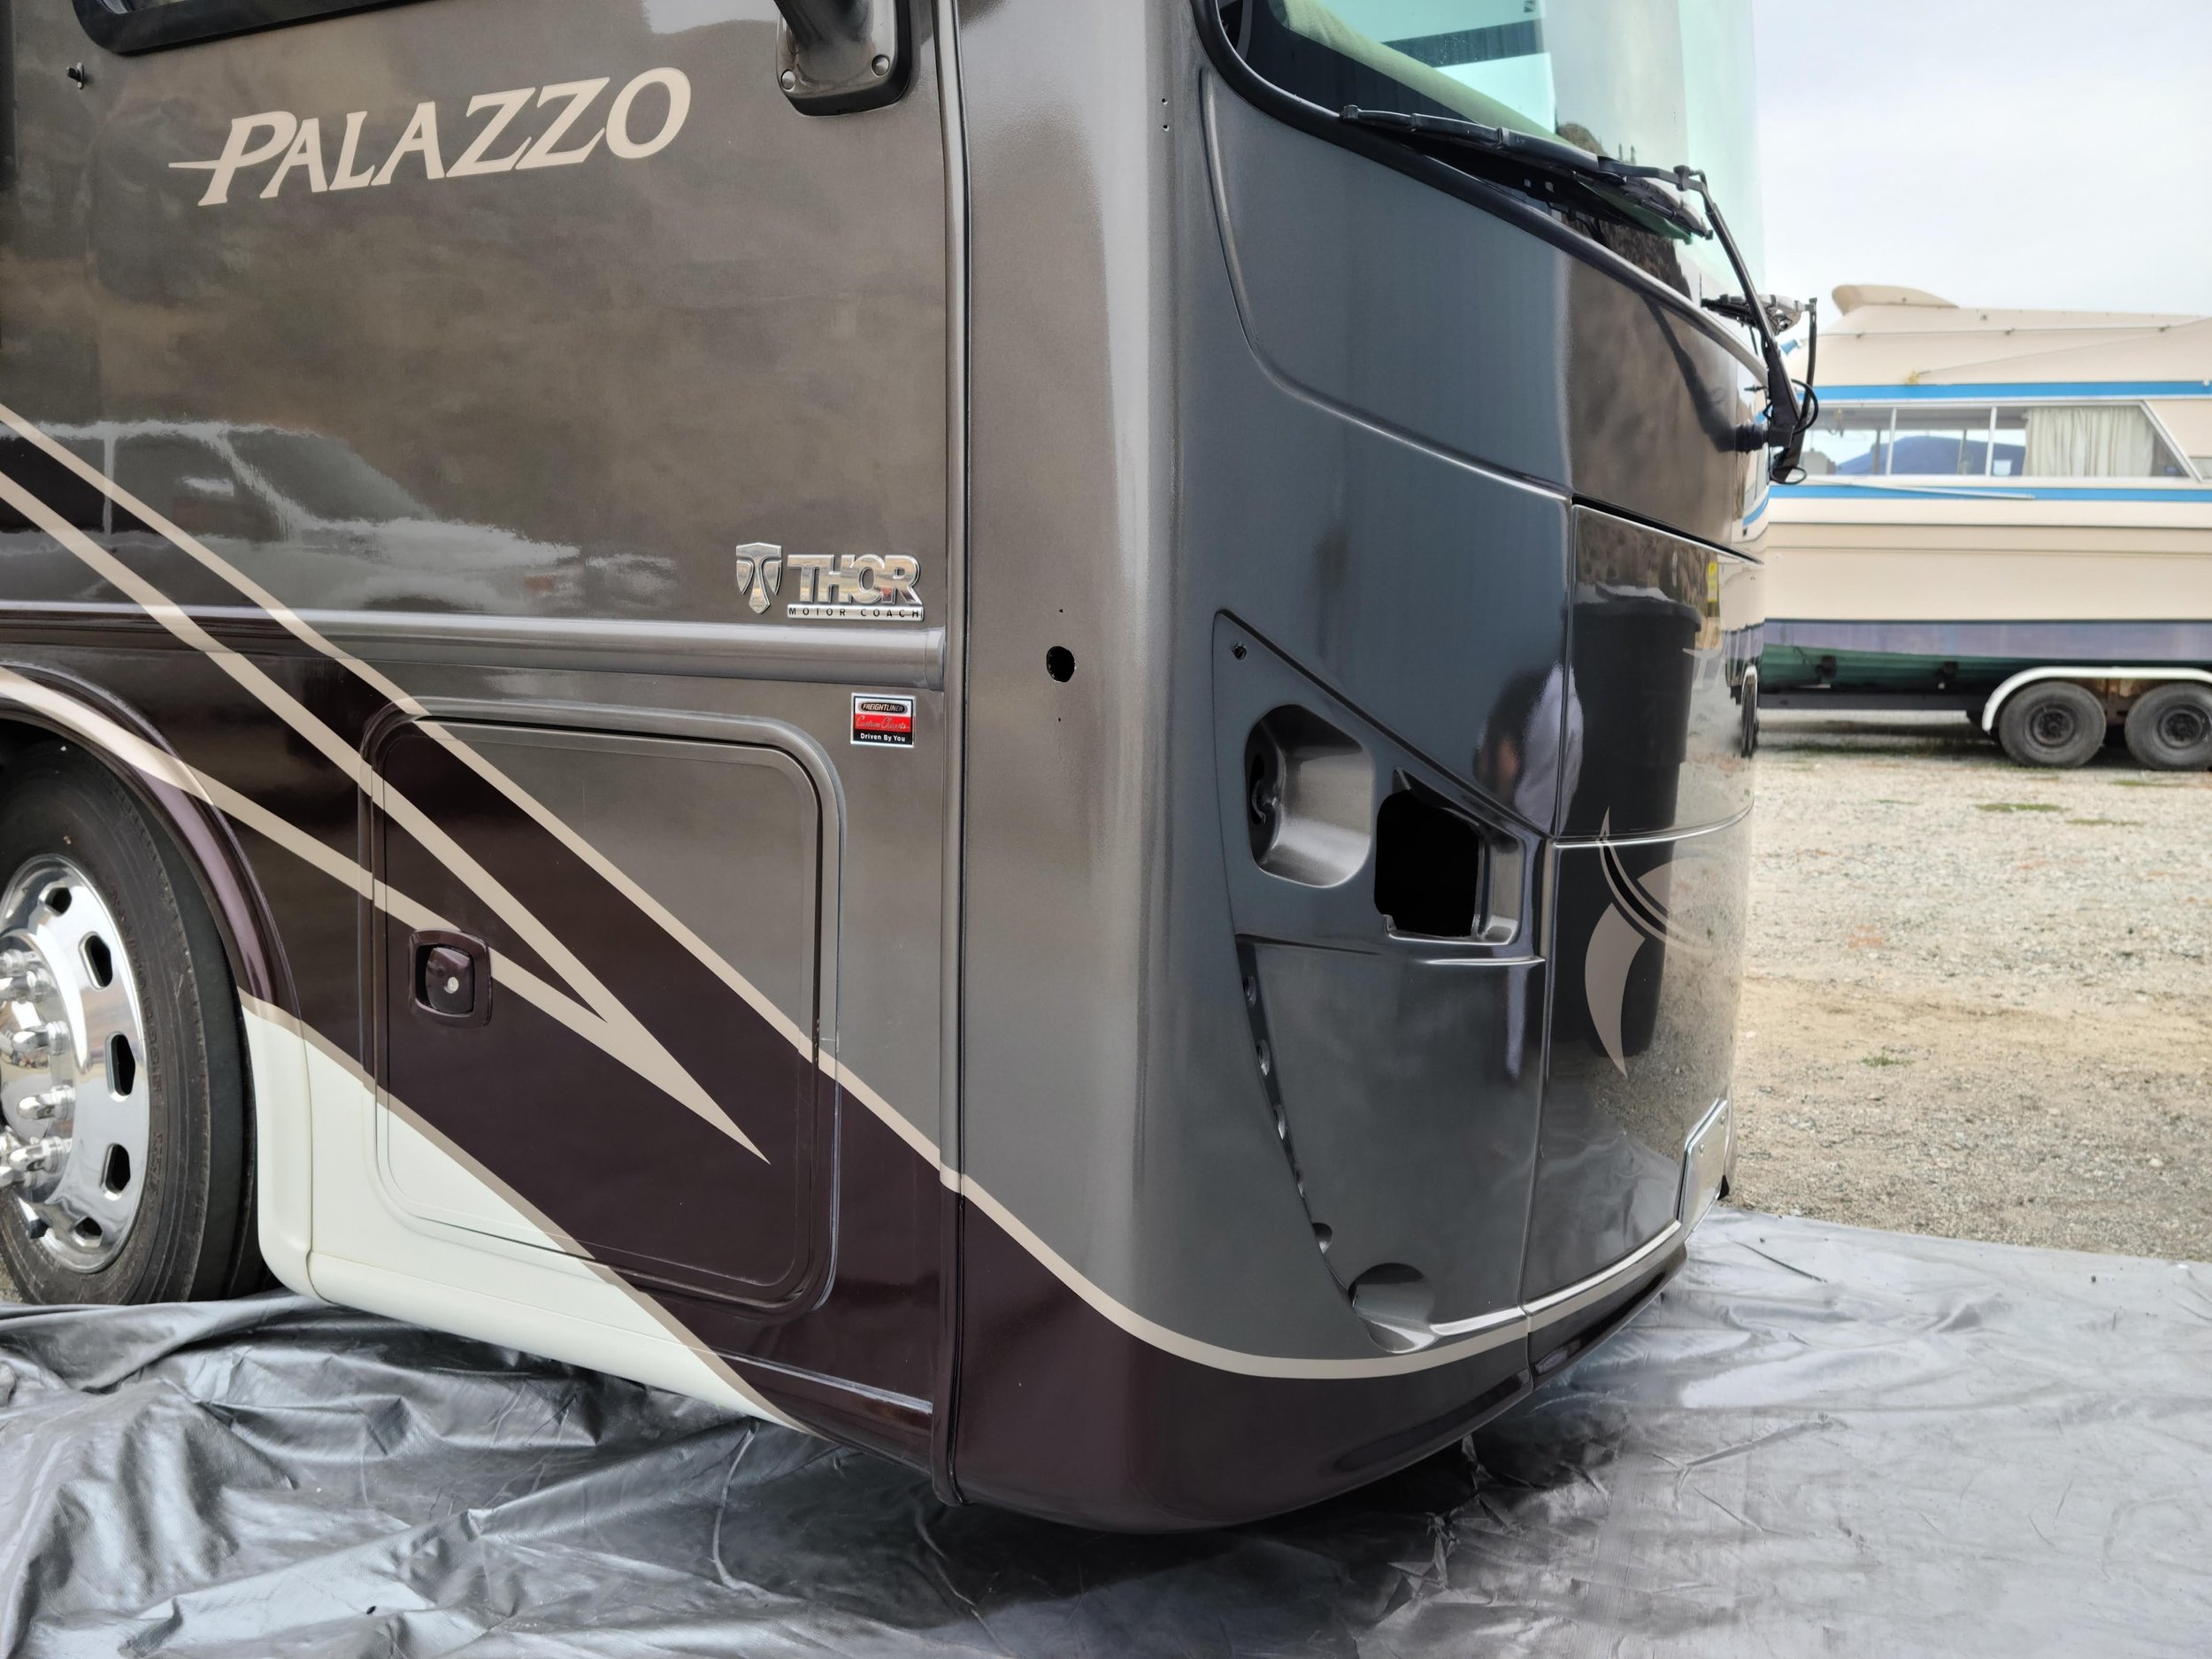
A motorhome’s front cap is a large, curved fiberglass shell, and this one wore a dark multi-tone finish with a pearl shimmer and sweeping accent stripes. Patching a small area in a finish like that is a lot like fixing one note in a song without anyone hearing the edit.

The holes also sat close to light and trim openings, so the repair had to keep every edge, curve, and fit exactly where the factory put it.

The Fix

Step 1: Protect and prep. We masked off the lights, trim, and nearby stripes so only the damaged area was touched.

Step 2: Open and bevel. The holes were cleaned out and beveled so the new material would grip the old.

Step 3: Rebuild from behind. A backing was built first, then fiberglass and resin were layered in until the surface was solid again.

Step 4: Shape and prime. Fairing compound and sanding recreated the original contour, followed by primer.

Step 5: Match the finish. Color was mixed and test-sprayed on cards until it matched the aged paint, then blended into the surrounding panel.

Step 6: Clear coat and buff. Clear coat, a proper cure, and a careful buff brought the shine back so the repair disappears into the whole front end.

Before and After
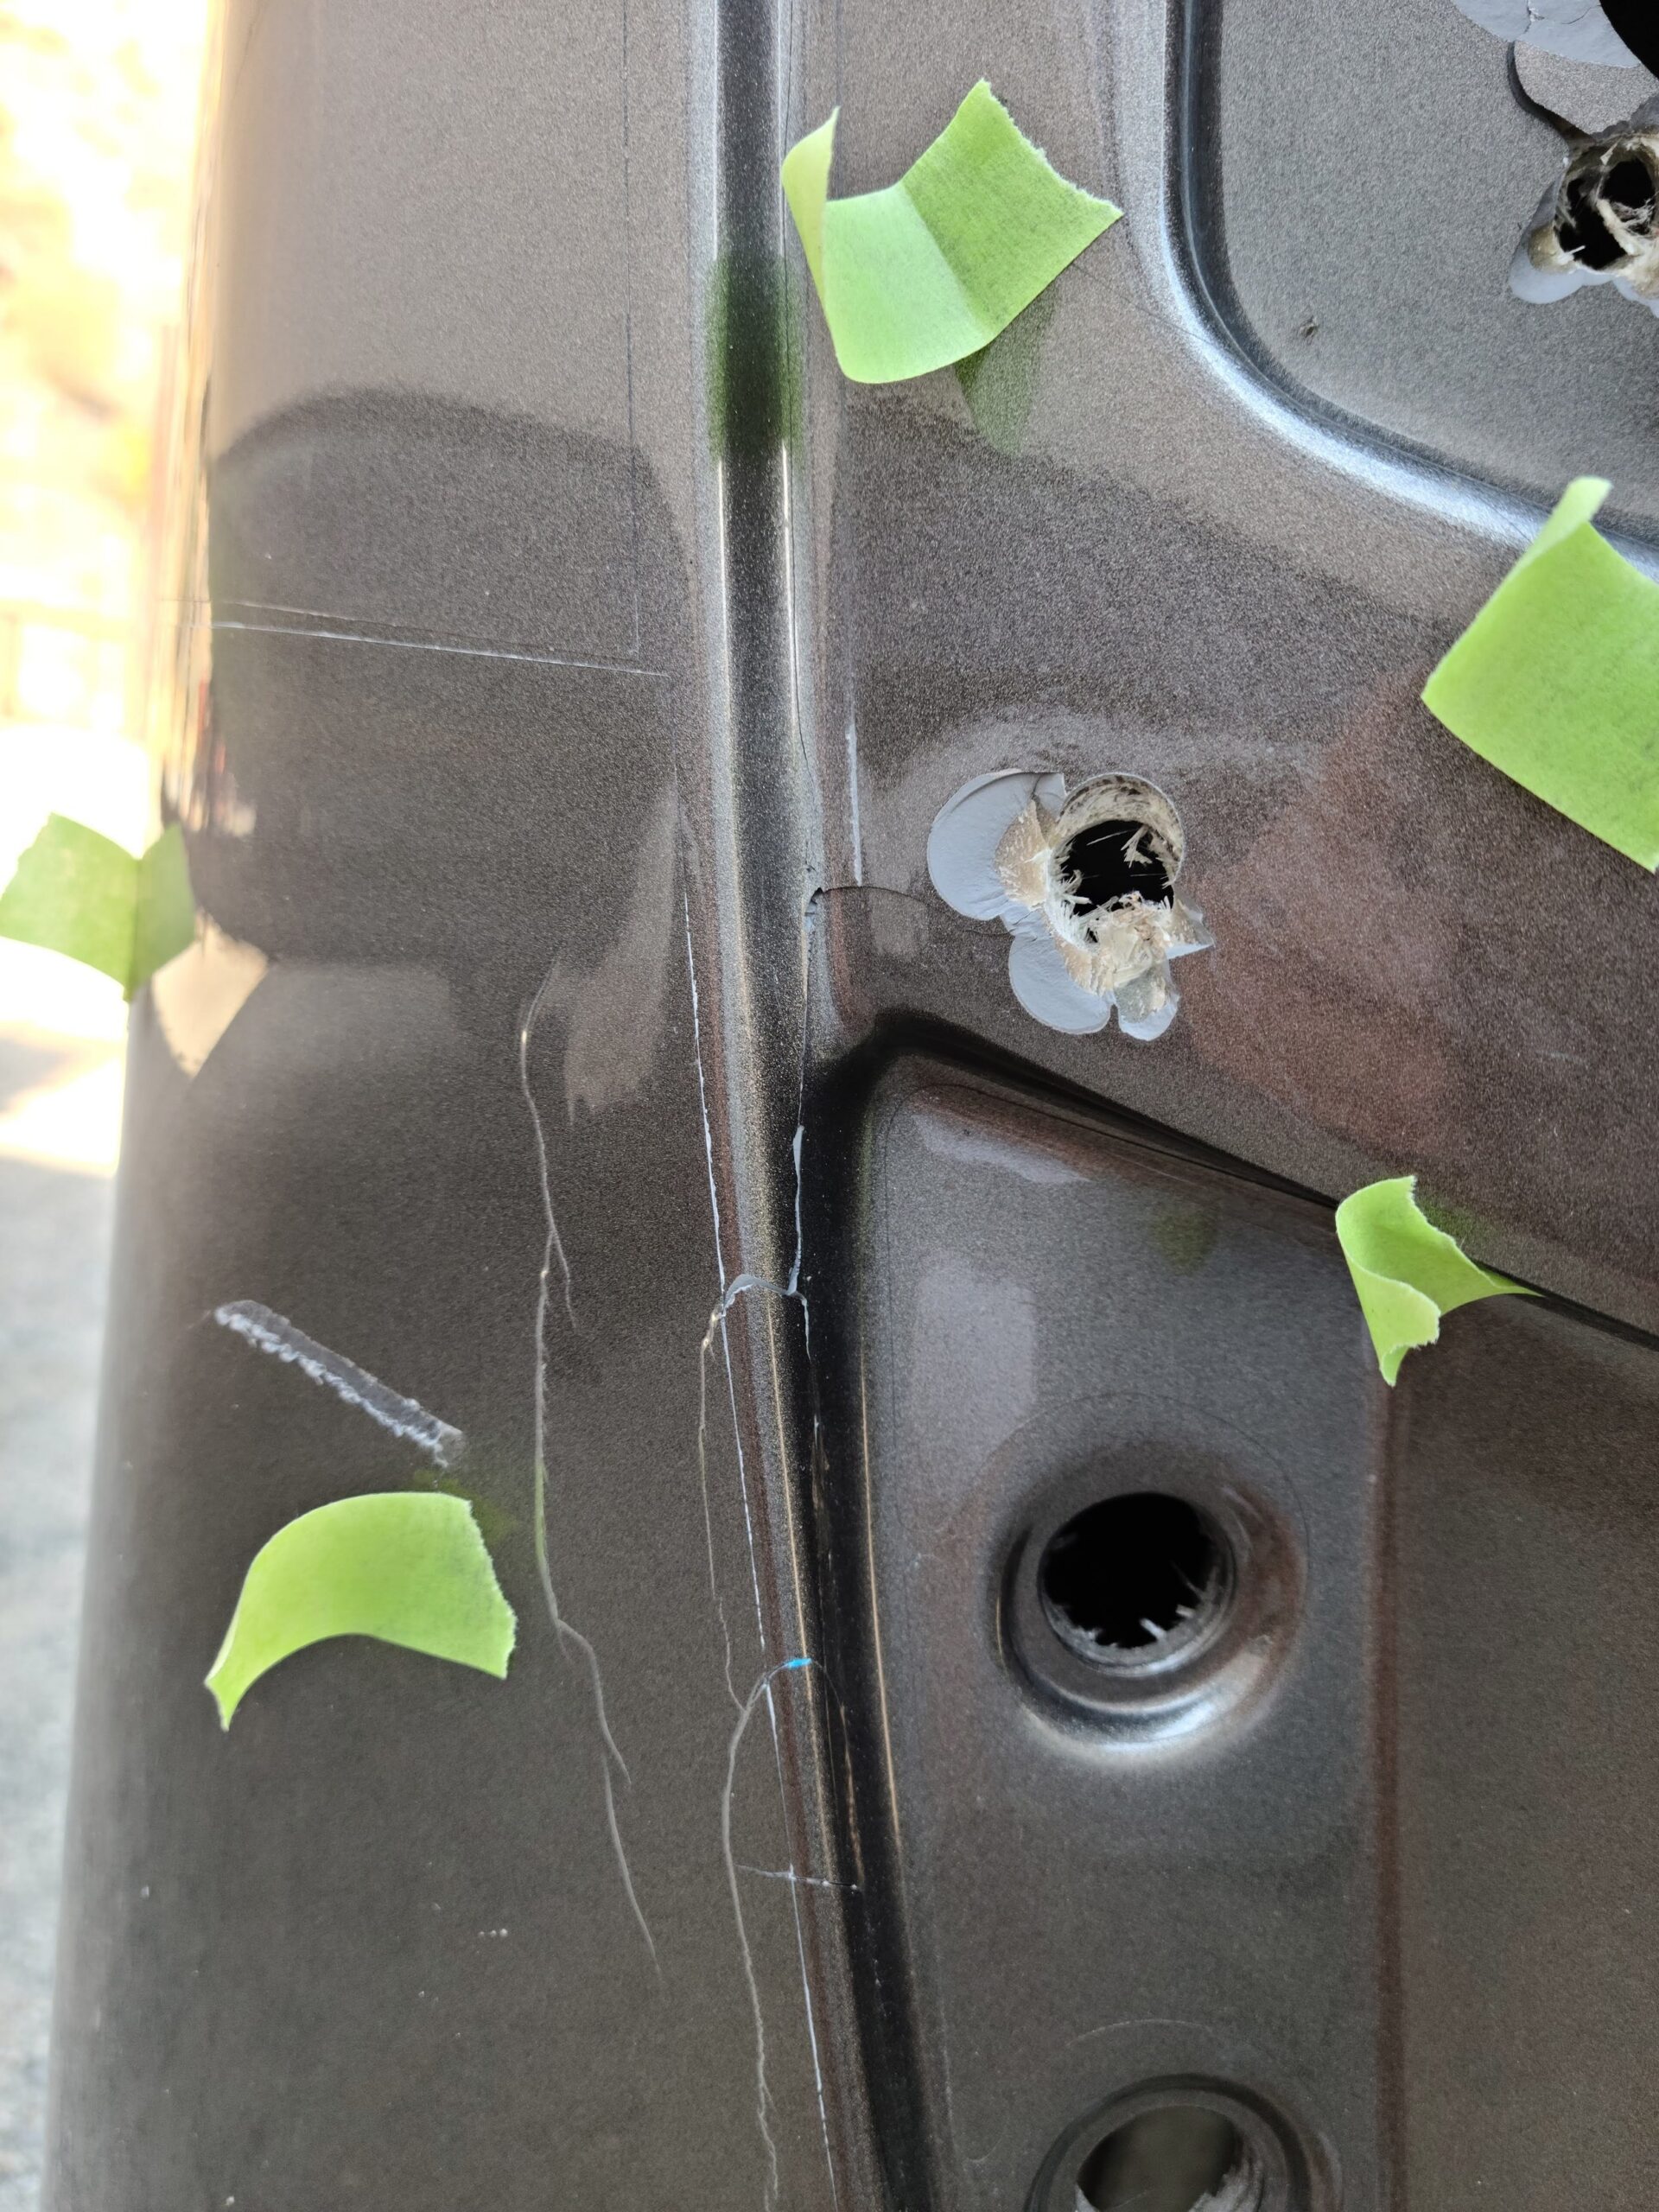
Close-up of holes in a dark motorhome front corner, marked with green tape before repair
Before
The motorhome front corner after fiberglass repair and paint matching
After

The Result

The front corner is smooth, solid, and the finish matches the rest of the coach. The only thing left of the mailbox incident is the story.

The road-trippers made it to Site 14 with time to spare, and the mailbox has been left alone ever since.

We drove away happy and left the mailbox story behind. Okay, we told the mailbox story at every stop the rest of the trip.

Sample customer comment (fictional, written for this design preview)

By the Numbers (Example Figures)

Layers of fiberglass cloth: 3 (sample)

Turnaround: 7 shop days (sample)

Campground reservations kept: 1 (sample)

Mailboxes harmed in the repair: 0 (sample)

These figures are sample numbers for layout purposes only.


Got a cracked, chewed-up, or just plain embarrassed piece of fiberglass? Call Fogle’s Fiberglass at 812-615-9046 or email foglesfiberglass@gmail.com and tell us what happened. We promise not to laugh (much).

Sample story for design preview only.
Three Dings, Zero Witnesses: The Wakesetter Dock Drama

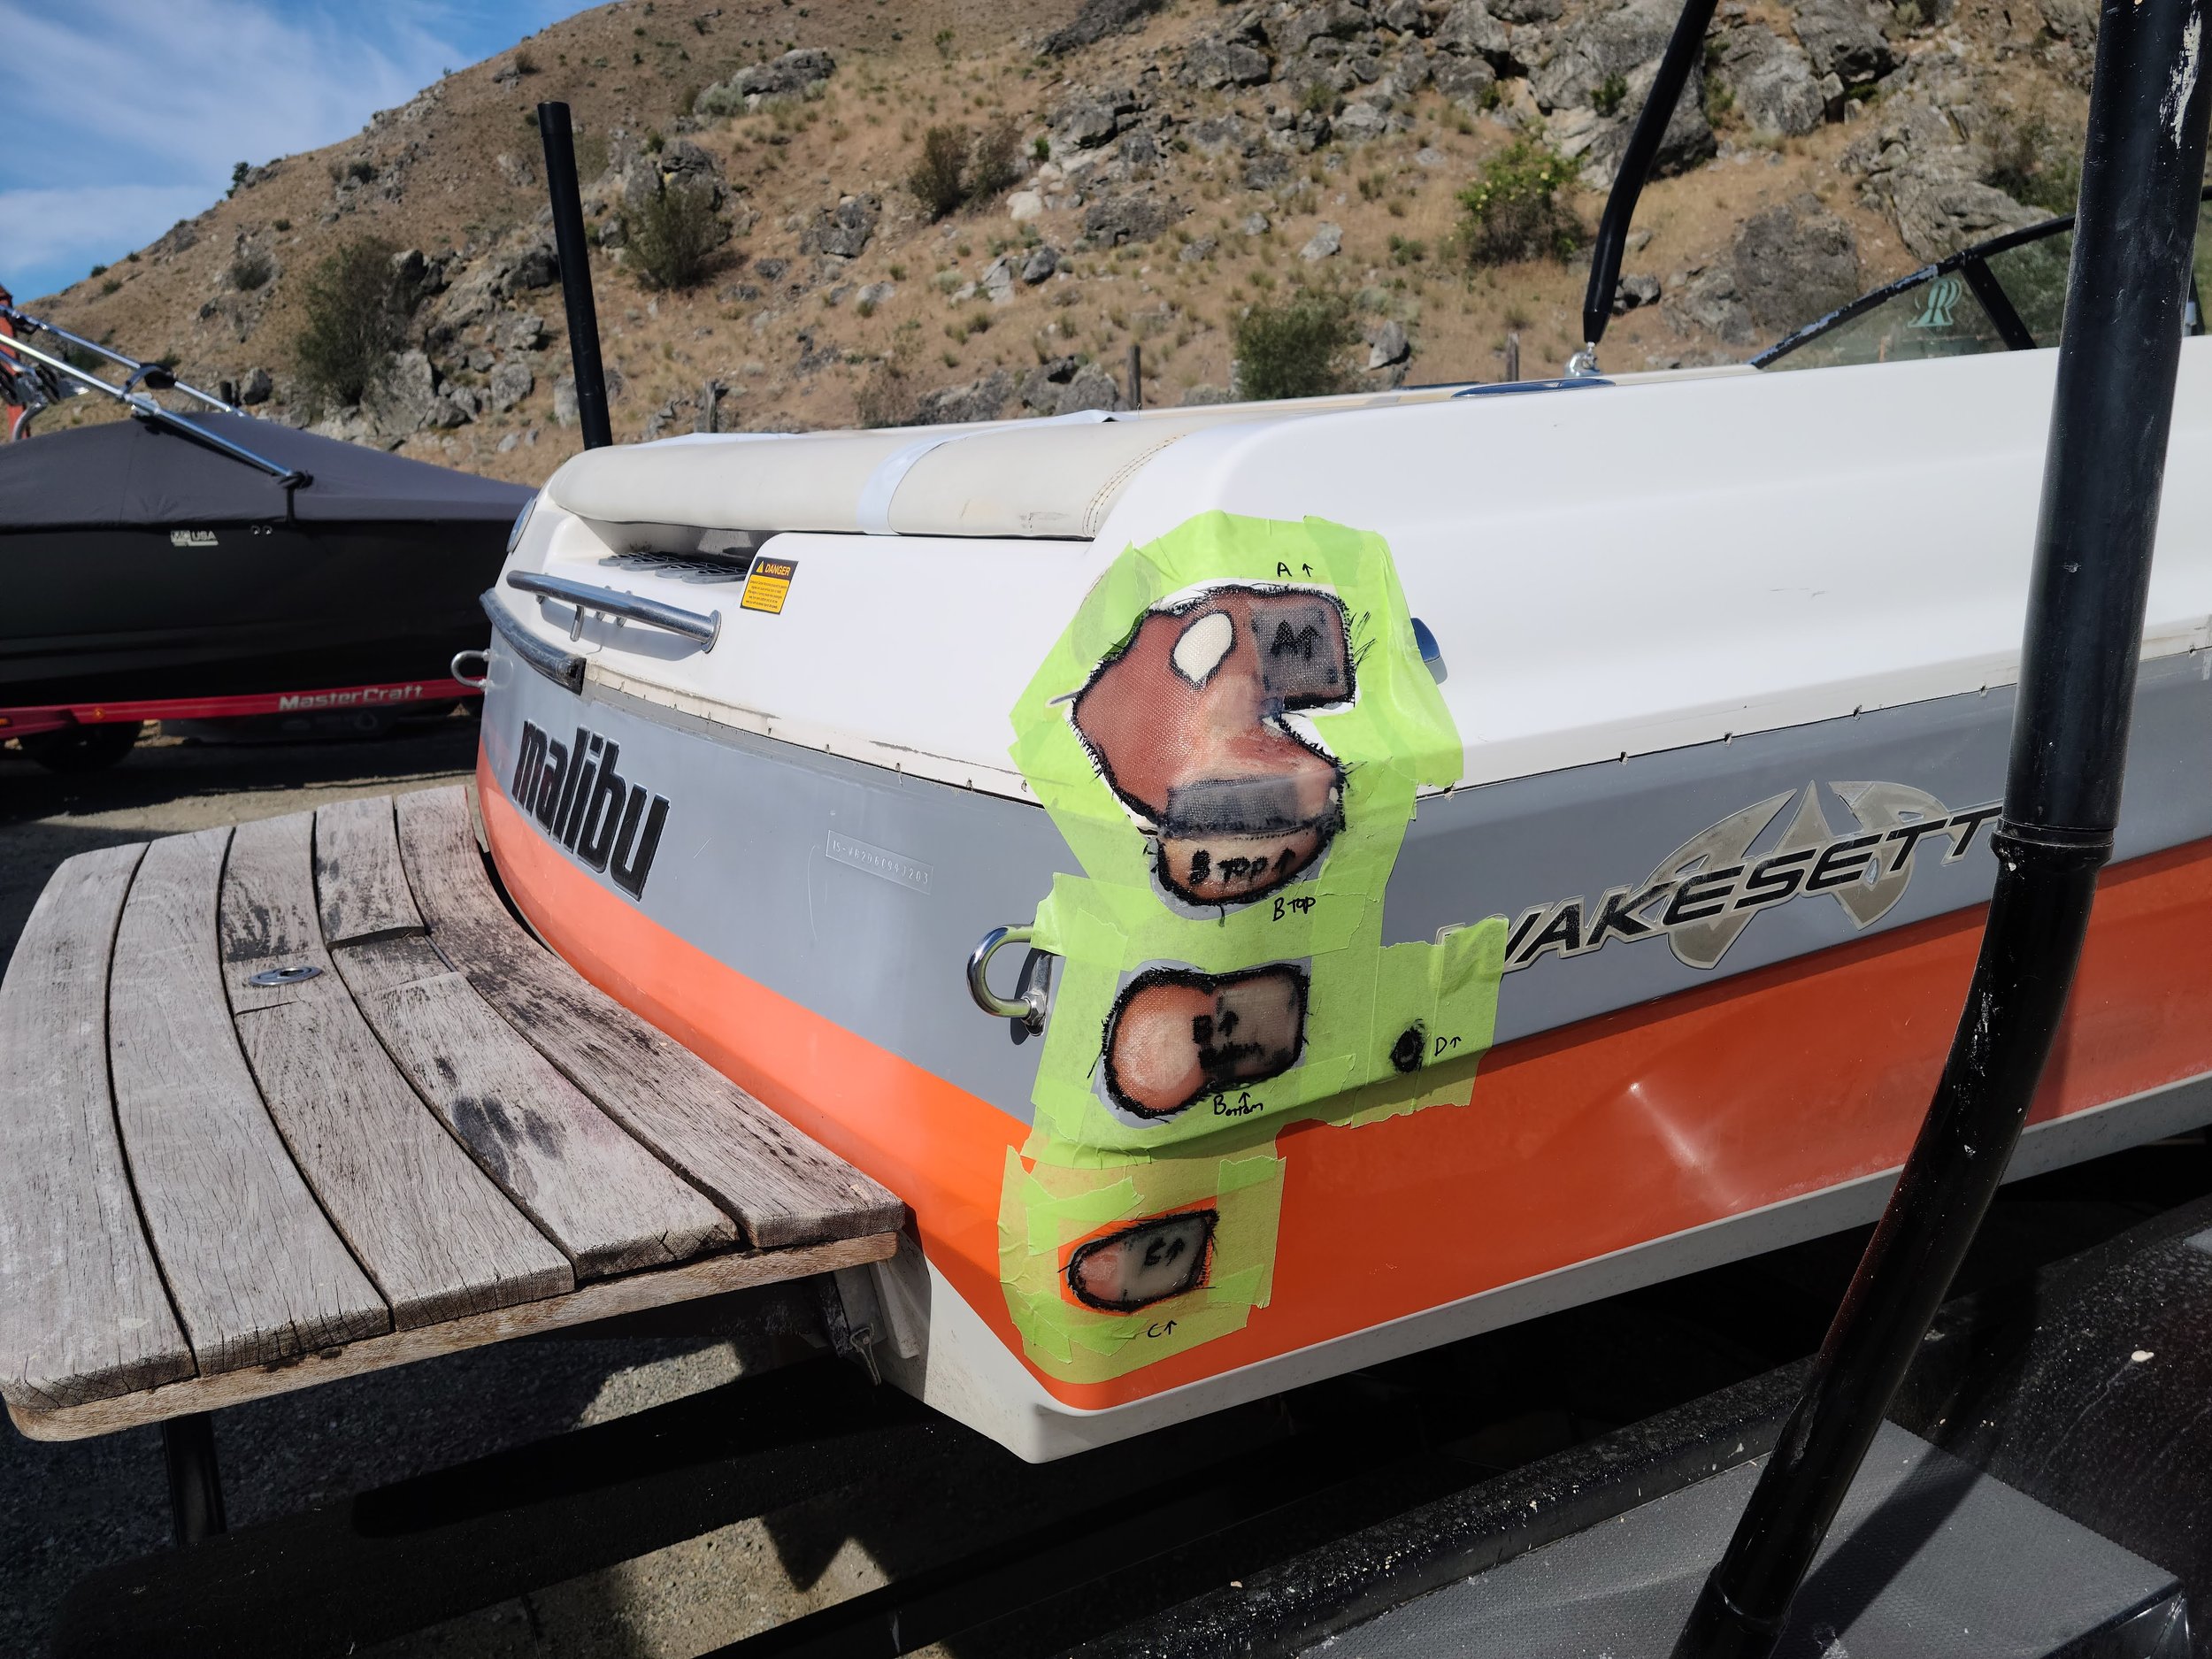
Ladies and gentlemen, welcome to the big game of the season: one wakeboat, one dock, and a rivalry for the ages. Grab a snack, because the replay is going to be rough.

What Happened

And it is a gorgeous afternoon at the lake, folks! Our boat is approaching the dock at a speed best described as optimistic. The captain is cool, calm, and about to be wrong. The dock cleat, a known troublemaker, makes its move!

Contact! Not once. Not twice. THREE times! The crowd (two ducks) goes silent. When asked for comment, the captain said, “The dock moved.” The dock has declined to respond.

The Challenge

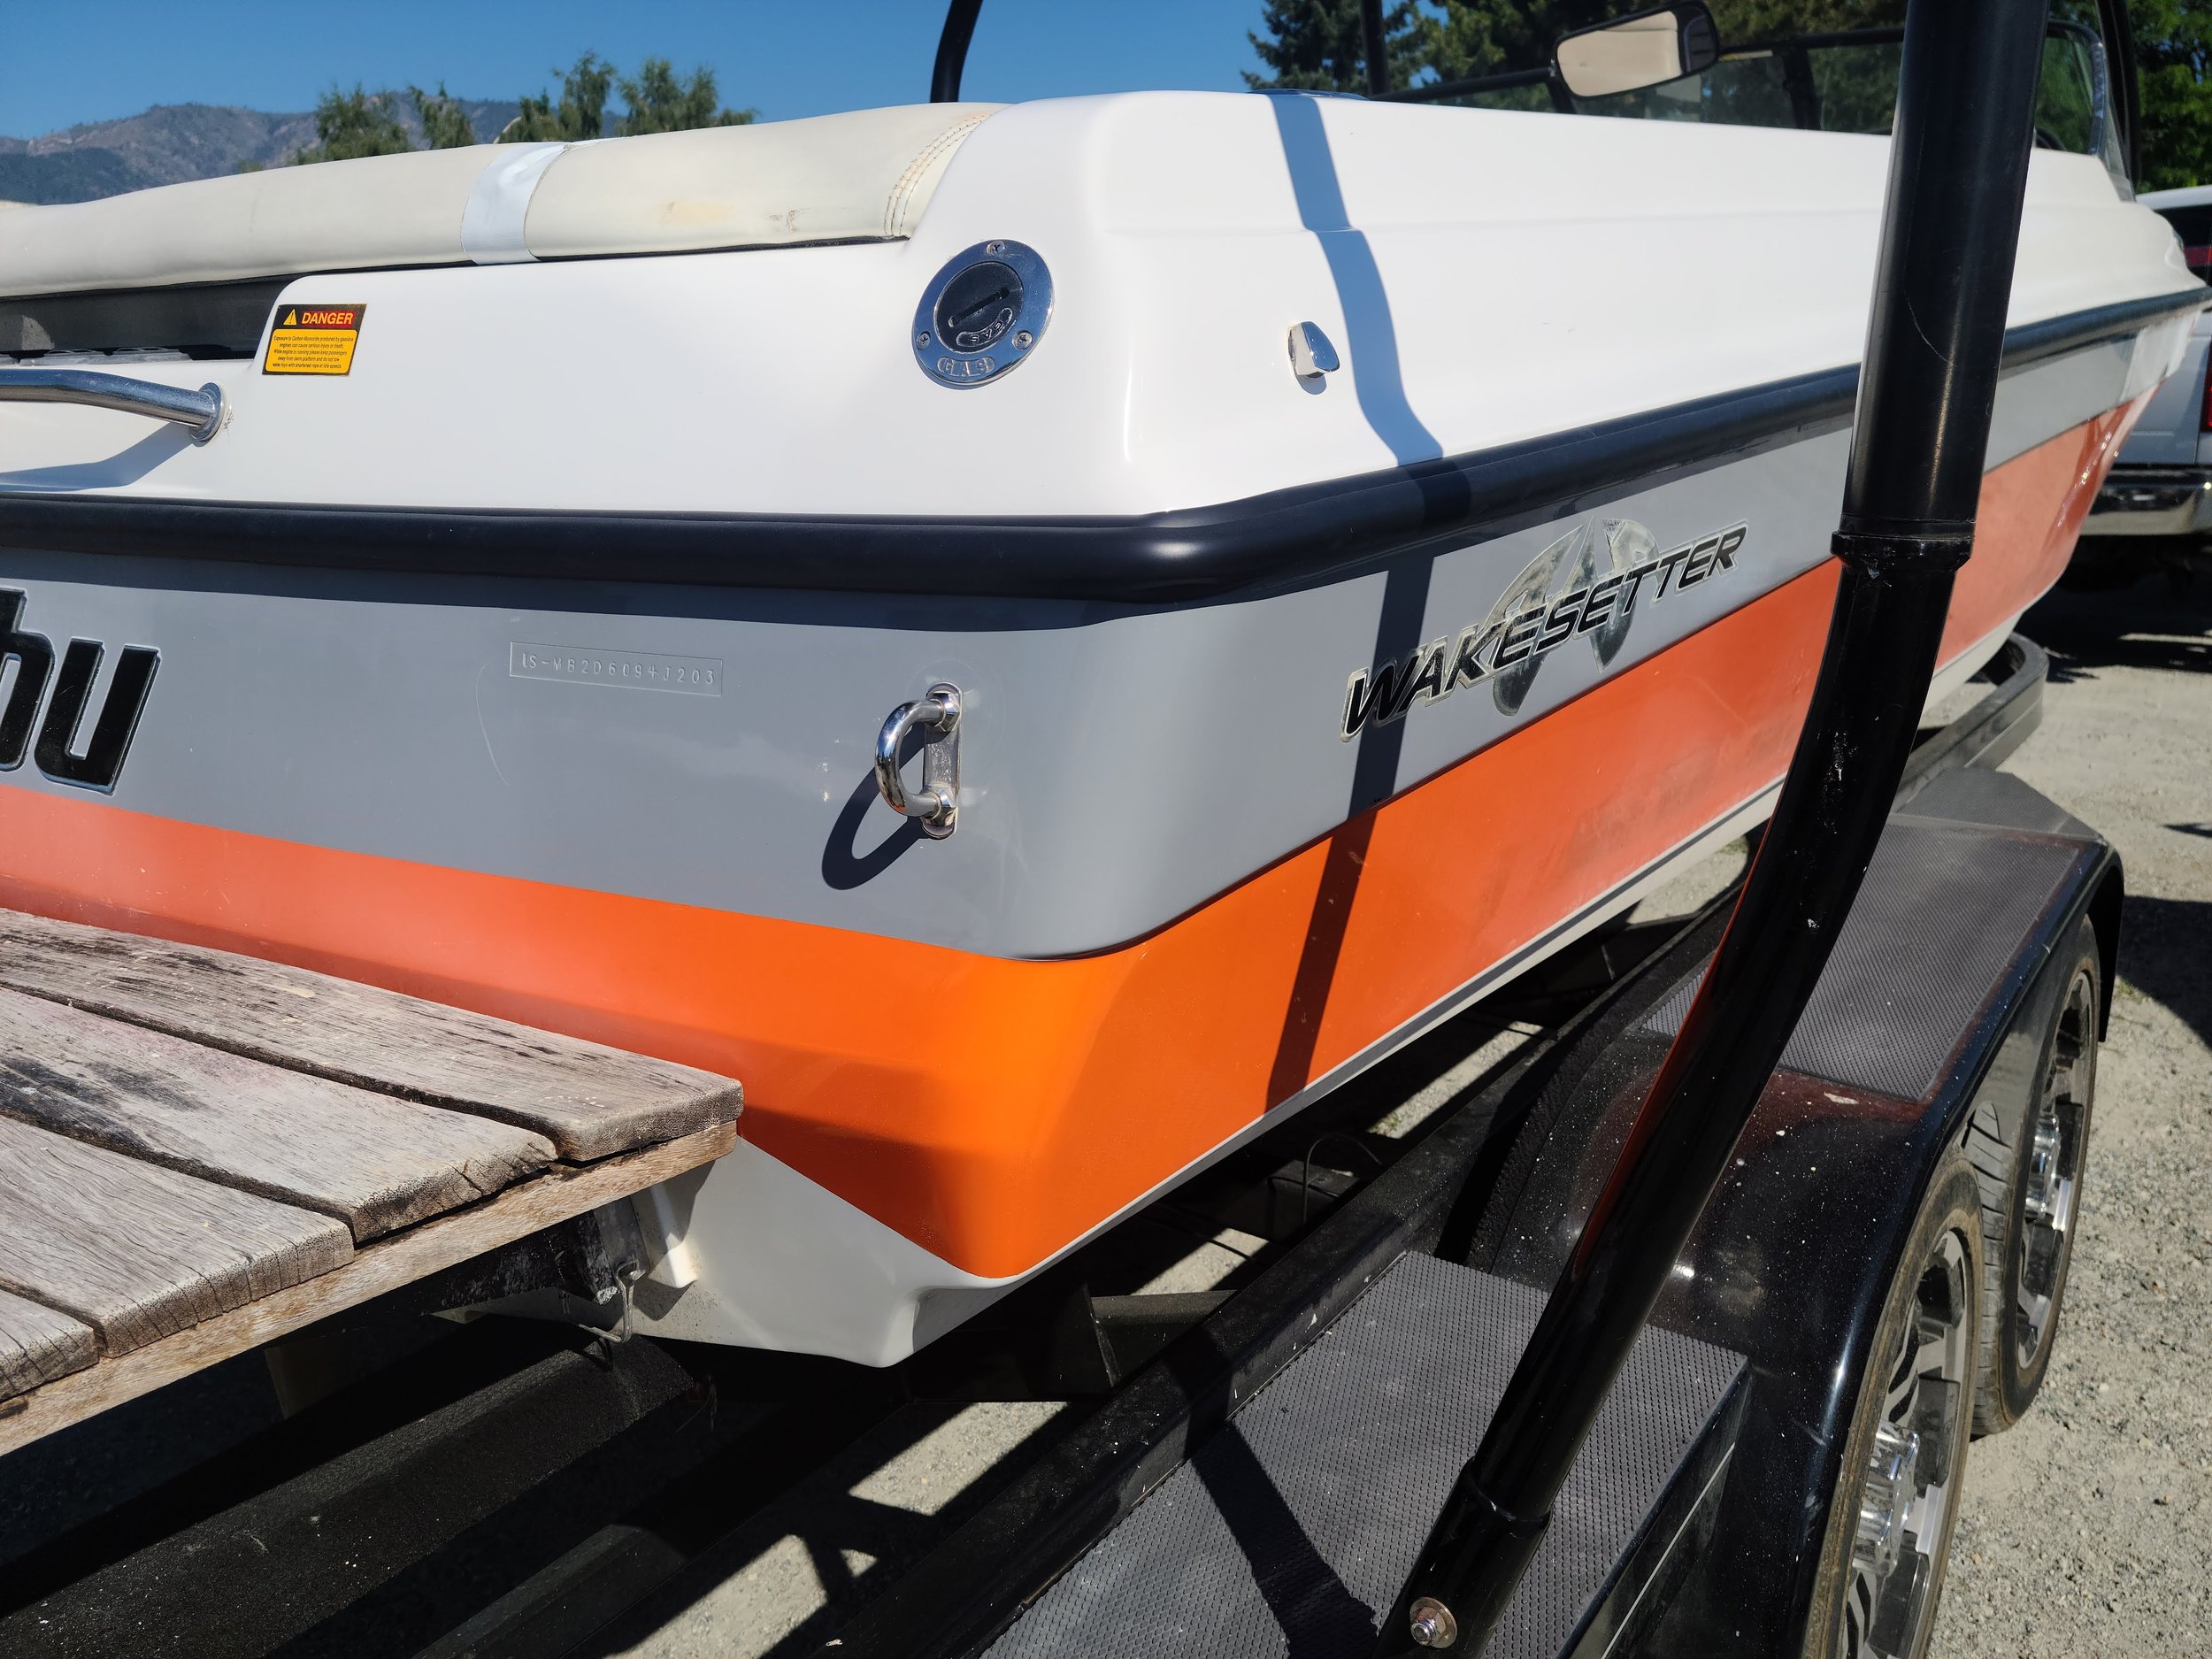
Three round divots cut through the gelcoat and into the laminate underneath, and they sat right where the gray panel meets the bright orange stripe. That meant matching two colors, not one, and holding a razor-crisp line between them.

Gelcoat also fades with sun and water, so the new orange could not just be factory orange. It had to be this boat’s orange, as it looks today.

The Fix

Step 1: Mark the damage. Each divot was taped off and labeled so the repair stayed small and precise.

Step 2: Open up the damage. We ground each spot back to solid, sound laminate and beveled the edges for a strong bond.

Step 3: Rebuild. Fiberglass and resin filled each hole layer by layer, then cured fully before we touched it again.

Step 4: Fair and sand. Filler and fine sanding blended the repairs into the curve of the hull sides.

Step 5: Color match. Test sprays were compared in daylight until the gray and the orange both matched the aged finish.

Step 6: Spray, polish, done. Color went on in thin coats, the stripe line was held sharp, and the whole area was wet-sanded and buffed to match the factory gloss.

Before and After

Wakeboat stern with three taped-off gelcoat divots across the gray panel and orange stripe
Before
The same boat stern after gelcoat repair with the gray panel and orange stripe matched
After

The Result

The stern looks like it has never met a dock in its life. The stripe is straight, the colors match, and the three divots have vanished.

The captain has promised to approach docks at a speed best described as sensible. We will believe it when we see it.

I went to show my buddy where the dings used to be and I could not find them. Now he thinks I made the whole story up.

Sample customer comment (fictional, written for this design preview)

By the Numbers (Example Figures)

Hours of sanding: 6 (sample)

Turnaround: 5 shop days (sample)

Divots remaining: 0 (sample)

Ducks impressed: 2 (sample)

These figures are sample numbers for layout purposes only.


Got a cracked, chewed-up, or just plain embarrassed piece of fiberglass? Call Fogle’s Fiberglass at 812-615-9046 or email foglesfiberglass@gmail.com and tell us what happened. We promise not to laugh (much).

Sample story for design preview only.
The Fender That Lost an Argument With a Barn Door

Every farm has a barn door with a reputation. This is the story of one very red tractor fender that learned that lesson the hard way, and how it rolled out of our shop looking showroom fresh.

What Happened

It was a quiet Tuesday morning, the kind where nothing goes wrong until it does. Our (entirely fictional) farmer was backing the tractor into the shed with total confidence and zero spotters. The barn door, which had been waiting years for this exact moment, swung out with the dramatic timing of a soap opera villain.

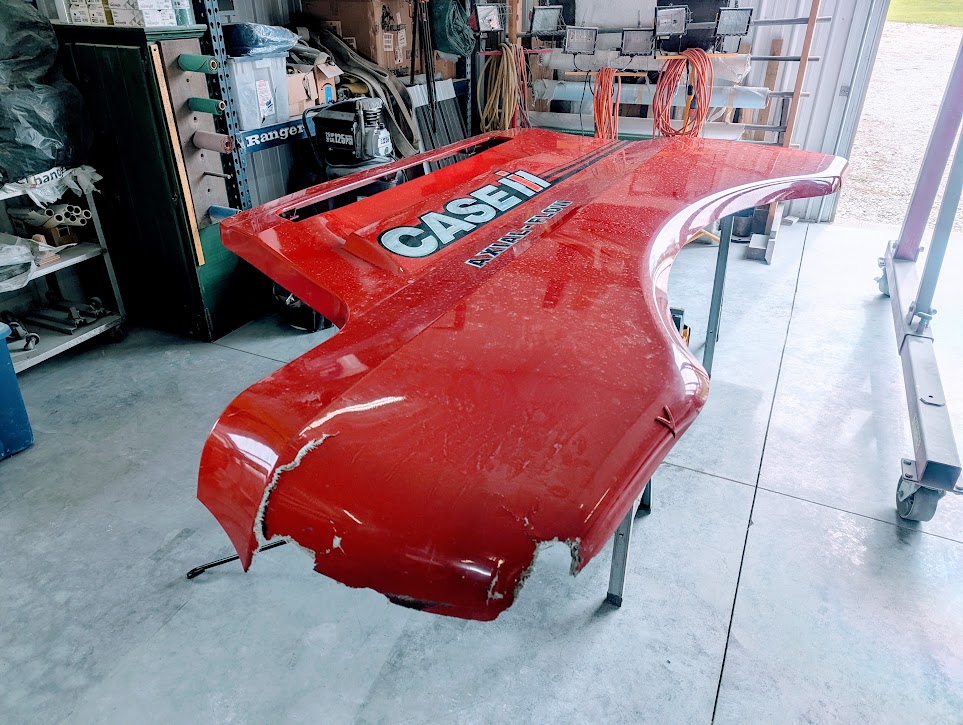
CRUNCH. The fender came away with a cracked edge, a missing chunk, and a look of deep betrayal. The barn door was fine. The barn door is always fine.

The Challenge

Big equipment fenders are wide, curved, and glossy, which means every flaw shows from across the field. The break ran along an edge that has to flex without cracking again, and the original red had to blend in with the rest of the tractor so nobody could play spot the repair.

Add factory decals and a sweeping curve with no straight lines to follow, and you have a puzzle that takes patience, not speed.

The Fix

Step 1: Clean and inspect. We washed the fender and mapped every crack so nothing was left hiding under the paint.

Step 2: Grind and taper. The broken edges were ground back and feathered so the new fiberglass has plenty of surface to bond to.

Step 3: Rebuild the edge. Layers of fiberglass cloth and resin brought the missing chunk back to its original shape and strength.

Step 4: Fair and sand. Filler and a lot of careful sanding followed the curve of the fender until it was smooth and true.

Step 5: Prime. Primer went on, was blocked flat, and showed us any low spots before color ever touched it.

Step 6: Match the red and finish. We mixed and sprayed a matching red, added clear coat, and polished the finish to a deep shine.

Before and After

Red tractor fender with a cracked and chipped edge before repair
Before
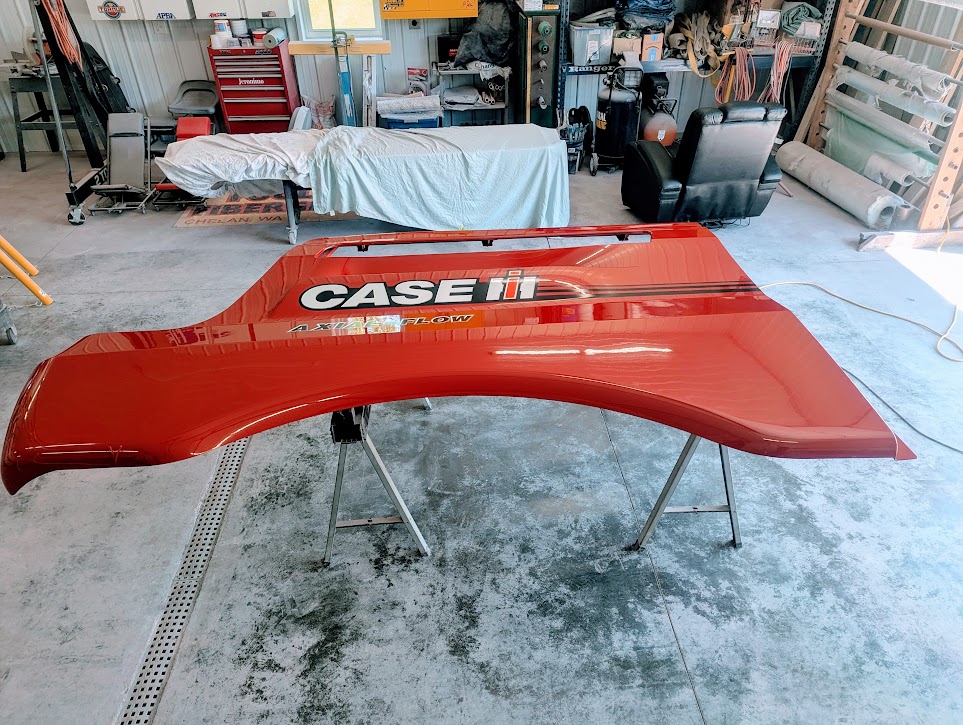
The same red tractor fender after fiberglass repair and refinishing
After

The Result

The fender is back on the tractor, the red matches, and the edge is stronger than before. The barn door has been given a stern talking-to.

From a few steps away you cannot tell where the damage was, and that is exactly the point.

I walked around that fender three times looking for the repair. I finally gave up and went to glare at the barn door instead.

Sample customer comment (fictional, written for this design preview)

By the Numbers (Example Figures)

Coats of gelcoat: 2 (sample)

Turnaround: 6 shop days (sample)

Layers of fiberglass cloth: 4 (sample)

Barn doors reprimanded: 1 (sample)

These figures are sample numbers for layout purposes only.


Got a cracked, chewed-up, or just plain embarrassed piece of fiberglass? Call Fogle’s Fiberglass at 812-615-9046 or email foglesfiberglass@gmail.com and tell us what happened. We promise not to laugh (much).

Sample story for design preview only.